In the realm of networking and system administration, efficient DNS (Domain Name System) management is crucial for seamless communication between devices. One powerful tool that simplifies DNS configuration is Dnsmasq. This article will guide you through the process Setup dnsmasq CentOS RHEL Rocky 7/8/9, providing step-by-step instructions and examples of its usage.
See Also: Install Unbound Ubuntu 20.04/22.04 With Package Manager
See Also: Install Unbound Ubuntu 20.04/22.04 with Compile
Why Dnsmasq?
Dnsmasq is a lightweight, easy-to-configure as DNS forwarder and DHCP server. It’s particularly useful for small to medium-sized networks, acting as a central hub for DNS resolution and IP address assignment. In this article we have concern in DNSMASQ as local dns authoritative. So we have domain with local IP and resovled with localhost IP address.
Installation and Configuration DNSmasq
Begin by installing Dnsmasq on your CentOS/RHEL/Rocky/AlmaLinux system. Use the package manager to install it.
sudo yum install dnsmasqOnce installed, edit the configuration file at /etc/dnsmasq.conf to customize settings.
Examples of Dnsmasq Usage
We can configure for customize settings for DNSMASQ.
- DNS Forwarding
Dnsmasq can forward DNS queries to external servers. Open the configuration file and add the following line to forward DNS requests to Google’s public DNS servers:
server=8.8.8.8
server=8.8.4.4- Local Domain Name Resolution
Define a local domain by adding the following line to the configuration file, allowing you to use custom domain names within your network:
domain=ourdomain.com- Custom DNS Records:
We can specify custom DNS records for specific hosts. For instance, if you want to associate the hostname “mail server” with the IP address 192.168.3.2, include the following line:
address=/mail.ourdomain.com/192.168.3.2- Setting Domain MX Record
Dnsmasq can also be configured to handle mail services by setting up Mail Exchange (MX) records.
mx-host=ourdomain.com,mail.ourdomain.com,0Summary configuration
Here is summary configuration of dnsmasq.
listen-address=127.0.0.1,192.168.3.2
server=8.8.8.8
server=8.8.4.4
domain=ourdomain.com
mx-host=ourdomain.com,mail.ourdomain.com,0
address=/mail.ourdomain.com/192.168.3.2
host-record=mail.ourdomain.com,192.168.3.2
After making changes to the Dnsmasq configuration file, remember to verify config and restart the Dnsmasq service for the changes to take effect:
[root@mail ~]# dnsmasq --test

#result

dnsmasq: syntax check OK.
Restart service dnsmasq. And check port running with netstat.
systemctl restart dnsmasq

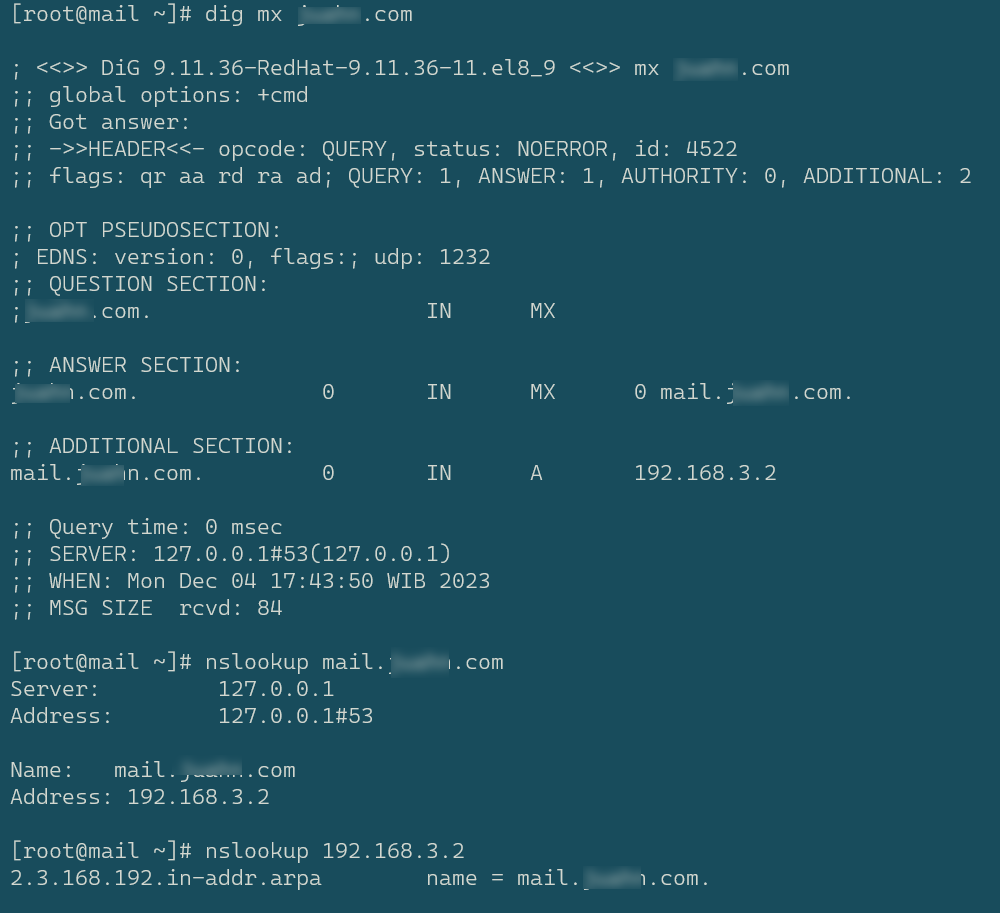
Testing Dnsmasq with dig command
Use the dig command to verify and query the DNS records. Here are some examples:
1. Querying A Record:
dig namedomain.com AThis command queries the A record for namedomain.com, returning the associated IPv4 address.
2. Querying MX Record:
dig namedomain.com MX 
Dnsmasq is a versatile and lightweight tool for DNS management and DHCP services. By following the guidelines provided in this article, you can seamlessly Setup dnsmasq CentOS RHEL Rocky linux system, improving network efficiency and simplifying administration tasks.
Hope it usefull, please feel free for comment.